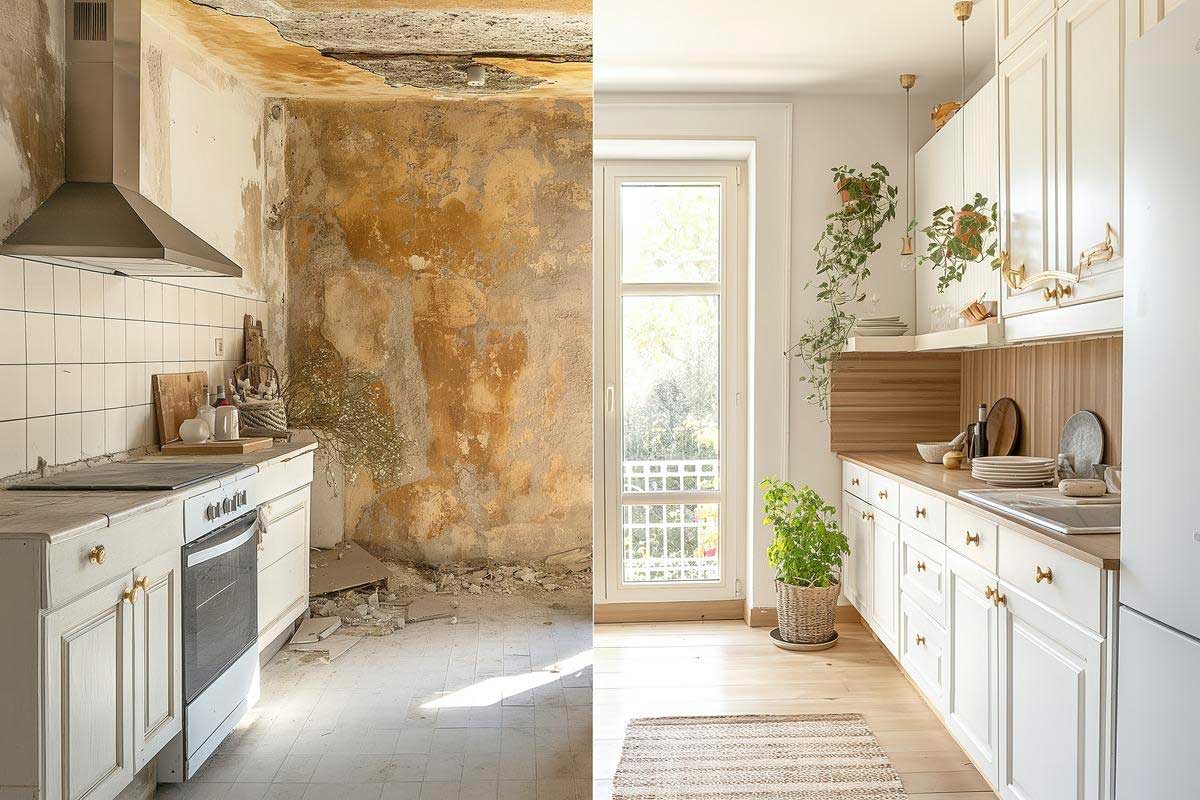
Kitchen makeovers on a budget deliver more than visual appeal. Homeowners can recover up to 72.2% of their investment during a home sale.
Simple updates can reshape the scene without emptying your wallet. Light neutral paint colors and modern hardware give homeowners many options to refresh their space at an affordable price.
Practical solutions make kitchens more functional and welcoming. LED lights under cabinets, peel-and-stick backsplashes, and open shelving improve both style and utility. These affordable improvements create an inviting atmosphere that makes daily cooking and gathering more enjoyable.
Contents
- 18 Budget-Friendly Kitchen Upgrades That Make a Big Impact
- Cabinet Transformations: Refreshing the Heart of the Kitchen
- Replace Countertops
- Lighting: Illuminating the Space and Setting the Mood
- Flooring and Walls: Foundation for Style
- Enhancing Functionality and Style: Small Touches, Big Impact
- Appliance Upgrades: Smart Investments
- Putting It All Together: Creating a Cohesive Look
- DIY vs. Hiring a Professional: Making the Right Choice
- Kitchen Upgrades Cost Comparison Guide
- Conclusion
- Frequently Asked Questions about Budget Friendly Kitchen Upgrades
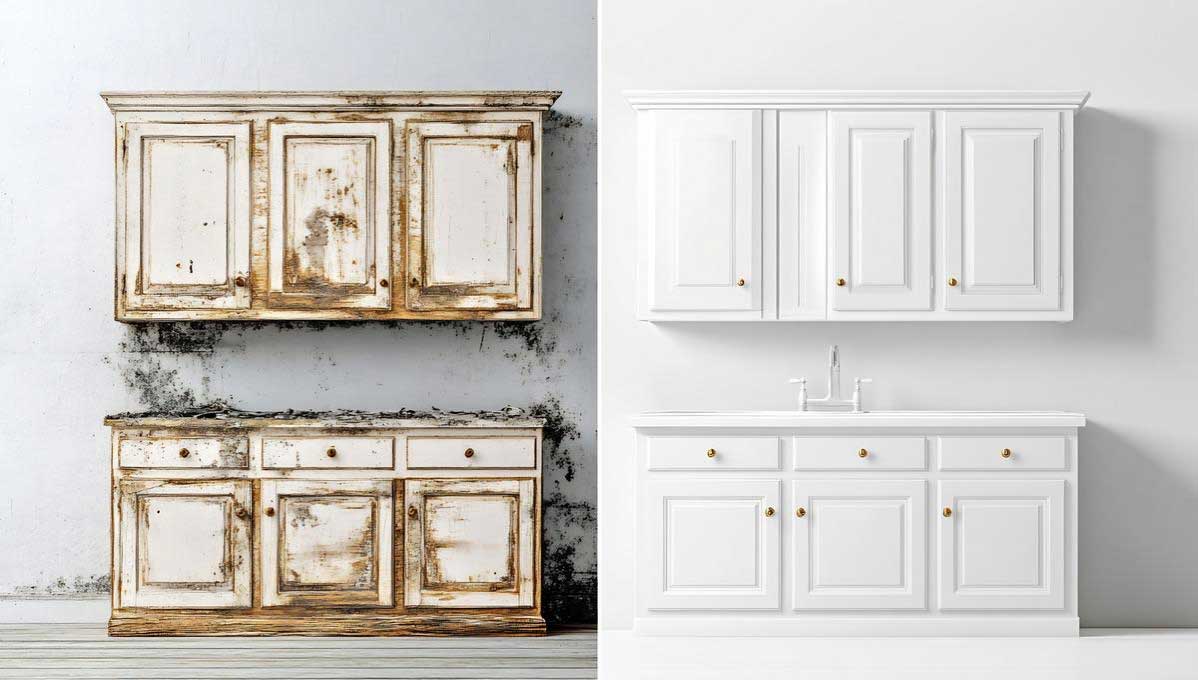
1. Cabinet Transformations: Refreshing the Heart of the Kitchen
Kitchen cabinet updates are one of the most meaningful ways to give your kitchen a fresh look. A new paint job, updated hardware, refacing, and smart storage solutions can change the space without breaking your budget.
1.1 Paint Your Cabinets
Cabinet painting is a budget-friendly way to update your kitchen’s look. High-quality acrylic latex-based paint will last longer and clean up easily. You should start by cleaning the cabinets with TSP cleaner to remove grease and dirt. Medium-grit sandpaper will create the right surface for paint to stick properly.
Achieving a flawless, factory-like finish on your kitchen or bathroom cabinets involves a meticulous process. While seemingly straightforward, each step requires careful consideration to ensure durability and a beautiful outcome. These are the foundational steps for a successful cabinet painting project:
These steps are the foundations of a successful paint job:
- Remove doors and hardware
- Clean surfaces thoroughly
- Sand and repair damaged areas
- Apply primer
- Sand between coats
- Apply final paint layers
- Remove Doors and Hardware: Begin by carefully removing all cabinet doors and drawers from their frames. Take off all hardware like hinges, knobs, and handles. This step is crucial for ensuring complete paint coverage on all surfaces and prevents paint from getting onto hardware, ensuring a clean, professional look and ease of reinstallation later.
- Clean Surfaces Thoroughly: Proper cleaning is paramount for paint adhesion. Use a degreaser specifically designed for kitchen cabinets to remove grease, grime, and food buildup, which are common, especially around stoves and sinks. For general cleaning, warm soapy water can be effective, but ensure all residue is rinsed and surfaces are completely dry before proceeding. This step ensures the primer and paint will properly bond to the cabinet surfaces.
- Sand and Repair Damaged Areas: Lightly sanding all paintable surfaces is necessary to create “tooth” for primer adhesion. Use a medium-grit sandpaper (like 150-grit) for the initial sanding. Inspect for any chips, dents, or imperfections. Repair these areas with wood filler, applying it smoothly and allowing it to dry completely before sanding it flush with fine-grit sandpaper (like 220-grit). Different wood types might react differently to sanding, so understanding the cabinet material is helpful.
- Apply Primer: Priming is a critical step, especially for cabinets. The type of primer needed can depend on the wood type and the existing finish. For instance, oil-based primers are excellent for stain blocking and are often recommended for wood cabinets prone to tannin bleed-through. Some wood types and darker original finishes may even require two coats of primer to ensure complete coverage and prevent bleed-through for a consistent and lasting topcoat color. Selecting the correct primer is essential for adhesion and the final finish quality.
- Sand Between Coats: After the primer has fully dried, lightly sand all primed surfaces with a fine-grit sandpaper (like 320-grit or higher). This smooths out any imperfections from the primer and creates an even better surface for the paint to adhere to. This step, often overlooked, significantly contributes to a smooth, professional-looking final finish by removing any raised grain or brush strokes from the primer.
- Apply Final Paint Layers: For a truly professional, durable, and smooth finish on cabinets, spray painting is highly recommended. Using a sprayer provides an even, factory-like finish that is very difficult to achieve with brushes or rollers, which can leave brush strokes or uneven texture. Apply thin, even coats of high-quality cabinet paint, allowing each coat to dry completely according to the manufacturer’s instructions before applying the next. Multiple thin coats are always better than one thick coat to avoid drips and ensure proper curing and durability.
Achieving a factory-smooth cabinet finish requires careful attention to detail at each step. For guaranteed professional results without the hassle, contact Northco Services today for expert cabinet painting in Ottawa and a free consultation..
1.2 Swapping Cabinet Hardware for an Instant Refresh
New hardware can change your cabinets’ look with little effort. Good quality knobs and pulls cost approx. $15 per handle. Modern finishes like copper, gold, and black look great in today’s kitchens, while brass and chrome give you a classic look that never goes out of style.
1.3 Cabinet Refacing
Cabinet refacing strikes a perfect balance between painting and complete replacement. You can update doors, hardware, and exterior surfaces while keeping the existing cabinet boxes. This approach helps homeowners save 30-50% compared to full cabinet replacement. The process involves adding new veneer to cabinet boxes and installing new doors, drawers, and hardware.
1.4 Add Interior Cabinet Organizers
Smart organization inside your cabinets makes storage work better. Vertical rollout drawers turn half-empty base cabinets into storage powerhouses. Sloping-sided rollout drawers keep tall items stable where you can see them. Drawer dividers and lid organizers are a great way to get your containers organized and easy to reach.
2. Cabinet Painting vs. Refacing vs. Full Remodel—What’s the Best Choice?
Your choice between cabinet painting, refacing, and full remodeling comes down to your budget, how good your cabinets look, and what you want to achieve. Each option has its own benefits when you’re trying to update your kitchen without breaking the bank.
Professional cabinet painting is the most budget-friendly option at $3500 to $6,500. This works best with cabinets that are in good shape but look outdated. You can save even more money by doing it yourself – the materials only cost $500-$800. This makes it a great choice if you’re watching your spending.
Cabinet refacing sits right in the middle price-wise, usually costing between $5,500 and $9,500 for an average kitchen. The process involves putting new doors and drawer fronts on your cabinets and painting existing boxes to match the door color. Your kitchen stays usable during the 3-5 day project.
A complete cabinet remodel is the most expensive route. Prices start at $25,000 to well over $100,000. You might use this option if your cabinets have major damage, you want to change your kitchen’s layout, or you need a totally new storage setup.
The state of your current cabinets often guides the decision. Cabinets that look old but are sturdy make perfect candidates to paint or reface. Solid wood cabinets can handle these updates well, no matter how old they are.
Time is a big factor too. Paint jobs take 8-10 days, refacing needs 3-5 days, but full remodels can last 4-6 weeks. Each option affects your kitchen access differently.
The money you get back varies with each choice. Paint jobs return about 80% of their cost, refacing gives back 70-80%, and full remodels return 60-70%. These numbers make painting and refacing smart choices if you plan to sell within 5 years.
So, how long do these cabinet updates actually last? Well, pro paint jobs and refacing? They’re pretty similar, both looking good for around 8 to 10 years. But, here’s the thing people forget – you can repaint both of those options again down the road! New cabinets will give you the longest run, usually 20 to 25 years. This means higher upfront costs might make sense if you plan to stay in your home longer.
Paint jobs often work best for small kitchen updates on a budget. They can make a big visual change without costing too much. But if your cabinets have lots of damage or an outdated layout, you might need more extensive work despite the higher price tag.
3. Countertops and Backsplashes: Functional and Stylish Upgrades
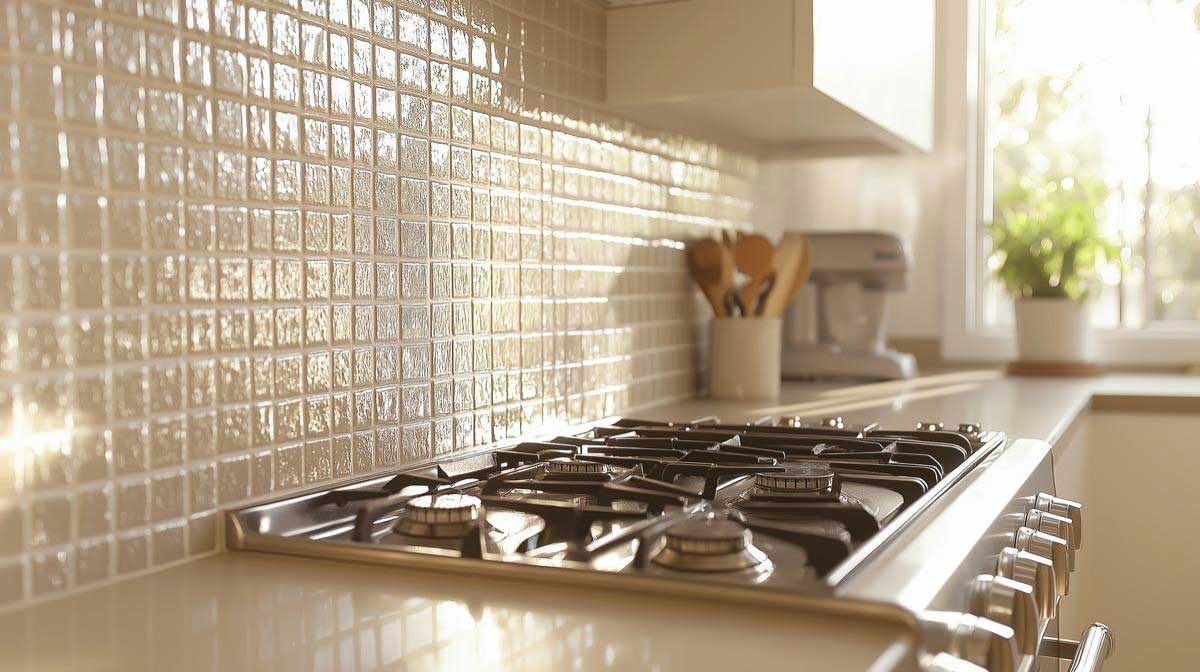
Surface upgrades are the foundations of budget-friendly kitchen makeovers. The right countertop materials and backsplash designs will give a dramatic improvement to both functionality and visual appeal without breaking the bank.
3.1 Replace Countertops
Your choice of countertop depends on how durable it needs to be, how much maintenance you want to do, and what fits your budget. Several wallet-friendly options can give you amazing results:
Butcher block brings a classic appeal at CAD 70 to CAD 140 per square foot. This material looks perfect in cottage-inspired and farmhouse-style kitchens. You’ll need to oil it regularly and clean up spills right away.
Laminate countertops are the most budget-friendly choice, with prices from CAD 20 to CAD 90 per square foot. Today’s laminate surfaces are more durable and come in patterns that look just like natural stone.
Solid surface countertops cost between CAD 55 to CAD 210 per square foot. These materials need almost no maintenance and you can easily sand out scratches and burns.
Backsplash installations typically run between CAD 32 to CAD 243 per linear foot. Most homeowners cover 25% to 75% of the wall above countertops.
|
Material |
Price Range (per sq ft) |
Durability |
|
Laminate |
CAD 20.90 – 90.57 |
Moderate |
|
Solid Surface |
CAD 55.73 – 209.00 |
High |
|
Butcher Block |
CAD 69.67 – 139.34 |
Good |
|
Quartz |
CAD 69.67 – 139.34 |
Excellent |
Ceramic tile remains popular because it offers many style options at budget-friendly prices. Here are some money-saving approaches:
- Mosaic tile sheets help cover larger areas quickly
- Peel-and-stick options work great as temporary solutions
- Glass tile accents add visual interest
- Pre-mixed grout eliminates sealing needs
A proper installation will last longer. Tile installations need poly-blend sanded grout for joints 1/8-inch or larger, while smaller joints work better with unsanded varieties. Grout sealer protects against stains and makes everything last longer.
Renters or quick-change artists might like vinyl applications. These materials are easy to install without permanent changes, making them perfect for temporary updates or testing design ideas before making permanent choices.
4. Lighting: Illuminating the Space and Setting the Mood
Kitchen lighting revolutionizes functionality and appearance. It is a vital element in budget-friendly renovations. The kitchen lighting market globally projects a 6.4% growth from 2024 to 2030, suggesting the growing need for well-planned illumination.
4.1 Lighting Improvements That Change the Ambiance Completely
A bright kitchen needs three main layers of light that create optimal illumination together. The foundation comes from ambient lighting that provides overall room brightness. Task lighting focuses on specific work areas, especially countertops and cooking zones. Accent lighting adds depth and visual interest.
Your kitchen needs bright task lighting in these key areas:
- Countertop preparation areas
- Cooking zones
- Sink and cleanup spaces
- Storage access points
Light fixture choices affect both esthetics and energy efficiency. LED options excel by using 75% less energy and lasting four times longer than fluorescent alternatives. These fixtures deliver superior color rendering and ensure proper illumination in food preparation areas.
4.2 Undercabinet Lighting
Undercabinet lighting is a game-changing addition to kitchen workspaces. These fixtures eliminate shadows from overhead lighting and provide focused illumination for food preparation. LED strip lights and puck lights are popular choices, with costs ranging from CAD 20 to CAD 70.
You can install these lights in several ways:
- Hardwired systems connect directly to wall switches
- Plug-in options make DIY installation simple
- Battery-operated units give maximum flexibility
- Peel-and-stick LED strips allow quick application
The color temperature of undercabinet lighting substantially changes the kitchen’s ambiance. Warm, inviting spaces need options under 3,000K. Brighter, task-oriented lighting works best between 4,000-5,000K. Yes, it is helpful to have dimmable options that adjust throughout the day for different activities and moods.
LED strip lights provide even illumination across long workspaces and eliminate dark spots and shadows. These fixtures need 1.5-3 watts per foot for accent lighting, or 4+ watts per foot for task lighting. Motion sensors and smart controls can optimize convenience while reducing energy consumption.
5. Flooring and Walls: Foundation for Style
Budget-friendly kitchen makeovers start with the right flooring and wall treatments. Durable vinyl planks at CAD 0.50 per square foot and decorative rugs will change your space without breaking the bank.
5.1 Update the Flooring
Your most economical choice is vinyl flooring, and luxury vinyl planks start at CAD 4.18 per square foot (excluding installation costs). The material’s exceptional durability needs just a simple damp mop to stay clean. Your subfloor’s condition must meet installation requirements to avoid extra costs.
Cork flooring gives you another budget-smart option at CAD 3.83 per square foot(excluding installation costs). This comfortable material matches beautifully with wood flooring in nearby rooms. Cork’s natural resistance to mold and microbes makes it perfect for kitchens.
5.2 Paint the Walls
Your paint choice will shape both looks and upkeep. Kitchen walls need eggshell or satin sheens because they’re easier to clean. Paint primer becomes essential when making big color changes to get proper coverage.
Different paint finishes add depth to your space:
- Eggshell finish on walls
- Pearl finish on cabinets and shelving
- Ultra-flat finish on ceiling
- Semi-gloss finish on trim
5.3 Add an Accent Wall
An accent wall can change your kitchen’s look without a huge investment. Wallpaper remains a classic choice, but board and batten or geometric patterns offer unique alternatives. Textured walls look best with low-sheen paint that helps hide surface irregularities.
DIY projects need proper planning. Your layout lines must be measured and marked carefully for professional results. Removable wallpaper works great for temporary changes or rental homes.
5.4 Add a Decorative Rug
The right rug placement boosts comfort and style. Galley-style kitchens work best with runners from 2.5’x7′ to 2.5’x12′. Smaller kitchen spaces need 2’x3′ or 3’x5′ rugs in neutral patterns.
Natural fiber rugs blend with any kitchen style and last longer. Jute and sisal rugs handle heavy foot traffic well. Your rugs should have slip-resistant backing and be placed carefully around work areas for safety.
6. Enhancing Functionality and Style: Small Touches, Big Impact
Simple kitchen design changes can make a big difference without major renovations. Budget-friendly updates like new faucets, open shelves, and smart storage solutions can change your kitchen’s look and feel.
6.1 Replace Your Faucet
New faucet designs combine style with function. Touchless faucets help keep your kitchen clean and reduce germs. Pull-down faucets make cleaning large pots easier with simple one-lever control. You can mount pot filler faucets above your stove to avoid carrying heavy water-filled pots across the kitchen.
6.2 Open Shelving
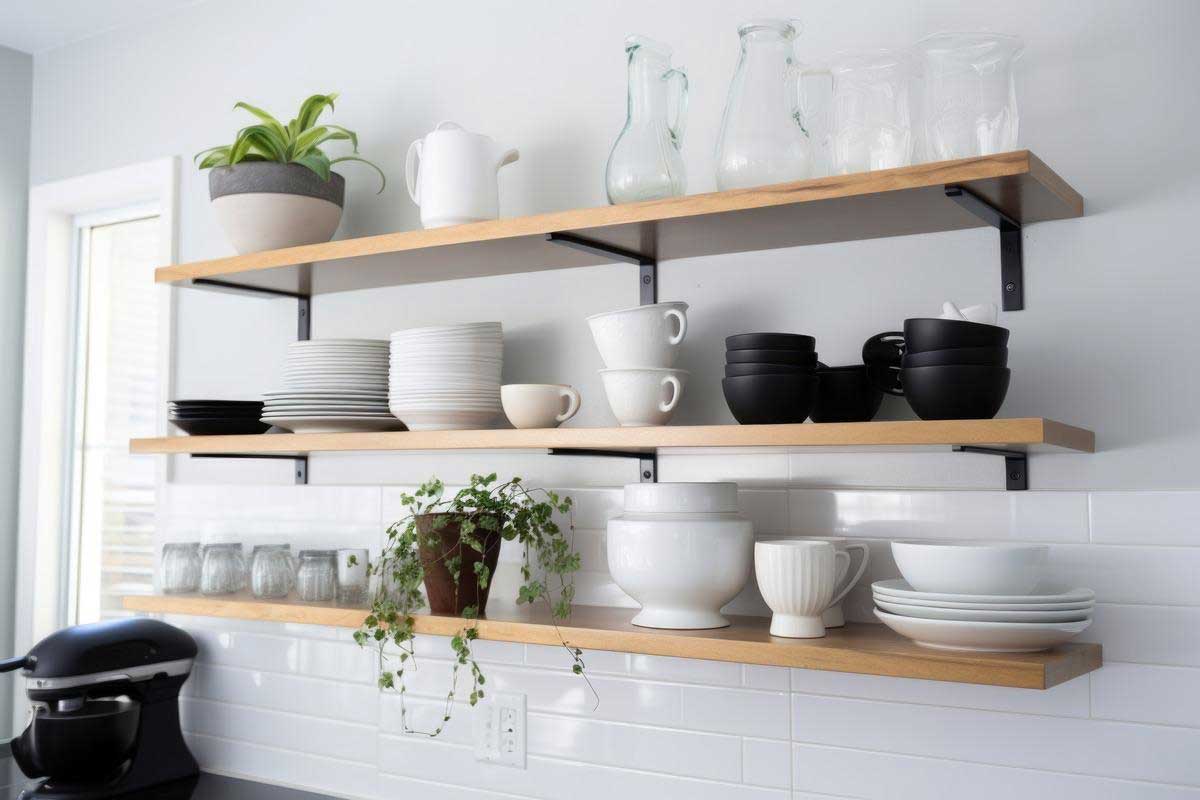
Open shelves add character and make the most of vertical space. You need to find wall studs for secure mounting. White oak and standard lumber from hardware stores are budget-friendly options. A beeswax treatment protects the wood while keeping its natural look.
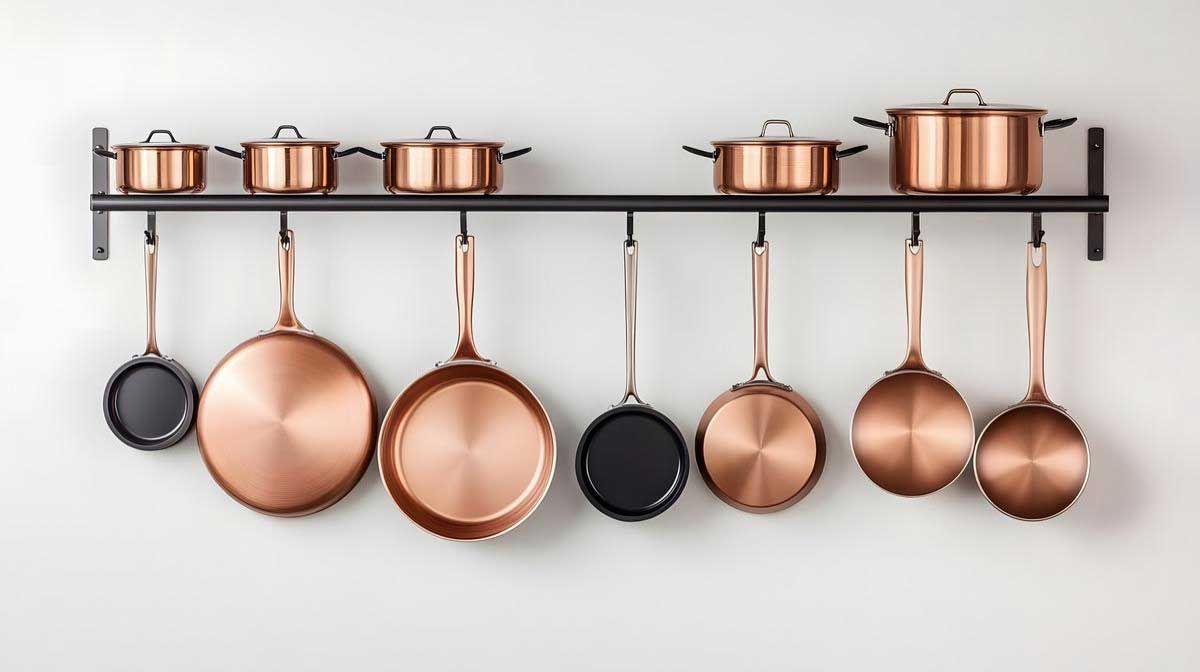
6.3 Pot Rack
If you’re ready to install fiber cement siding on your home in Ottawa, contact us for a free estimate today! We can’t wait to help you transform your home!
Pot racks boost storage space and look great too. Wall-mounted racks work great in small kitchens, with prices starting at CAD 14. Mounting directly to ceiling beams gives the best support for heavy cookware. Copper pipes can be a cheaper option than traditional materials and add nice metallic touches to your kitchen.
6.4 French Kitchen Island
French kitchen islands come in different styles to match your taste. Parisian designs feature elegant black and cream colors. French country styles use bold colors and rustic wood finishes. Curved details and grape vine patterns add authentic French charm.
6.5 Repurpose Old Furniture
Old furniture makes great budget-friendly storage. Vintage pieces cost less than custom cabinets, with quality hutches around CAD 1,670. Old tables can become kitchen islands – just add a butcher block top for a prep surface. These pieces add character and history to your kitchen while helping the environment.
7. Appliance Upgrades: Smart Investments
Upgrading kitchen appliances is a vital investment that improves functionality and energy efficiency. Modern appliances use far less energy than models from 15 years ago. Energy Star certified refrigerators cut carbon footprint by 8,200 pounds over five years.
7.1 Upgrade Appliances
Kitchen appliance packages vary in cost depending on the selections. Standard appliance packages represent one level of investment. Alternatively, choosing high-end appliances from premium brands will significantly increase the overall expense for a complete kitchen. For budget-conscious renovations, careful planning is essential when considering appliance replacements to manage overall project costs.
A smart approach to upgrading appliances can be achieved through targeted replacements:
- Refrigerator replacement: Modern stainless steel refrigerators can be a stylish and functional upgrade.
- Dishwasher upgrades: Dishwashers with enhanced features like touch controls offer improved convenience.
- Electric range options: Energy-efficient electric ranges are available and can be a practical upgrade.
- Microwave updates: Stainless steel microwaves can provide a coordinated and updated look to the kitchen
Energy efficiency is a key factor to consider. Today’s dishwashers use 4-6 gallons per load, which is half the water needed by 20-year-old models. Energy Star certified models work 12% better than standard options.
Induction ranges are the most energy-efficient choice for cooking and use 15% less power than electric coil alternatives. Convection ovens save more energy and use 20% less than standard models.
Smart technology makes kitchens work better with Wi-Fi enabled features and AI-powered capabilities. These improvements let you monitor remotely, adjust cooking automatically, and track energy use. The smart kitchen market could reach CAD 105.90 billion by 2033.
Store display models and returned items are great ways to save money on upgrades. Manufacturer rebates and price-match guarantees help reduce costs. Regular maintenance and cleaning help appliances last longer and give better value for your investment.
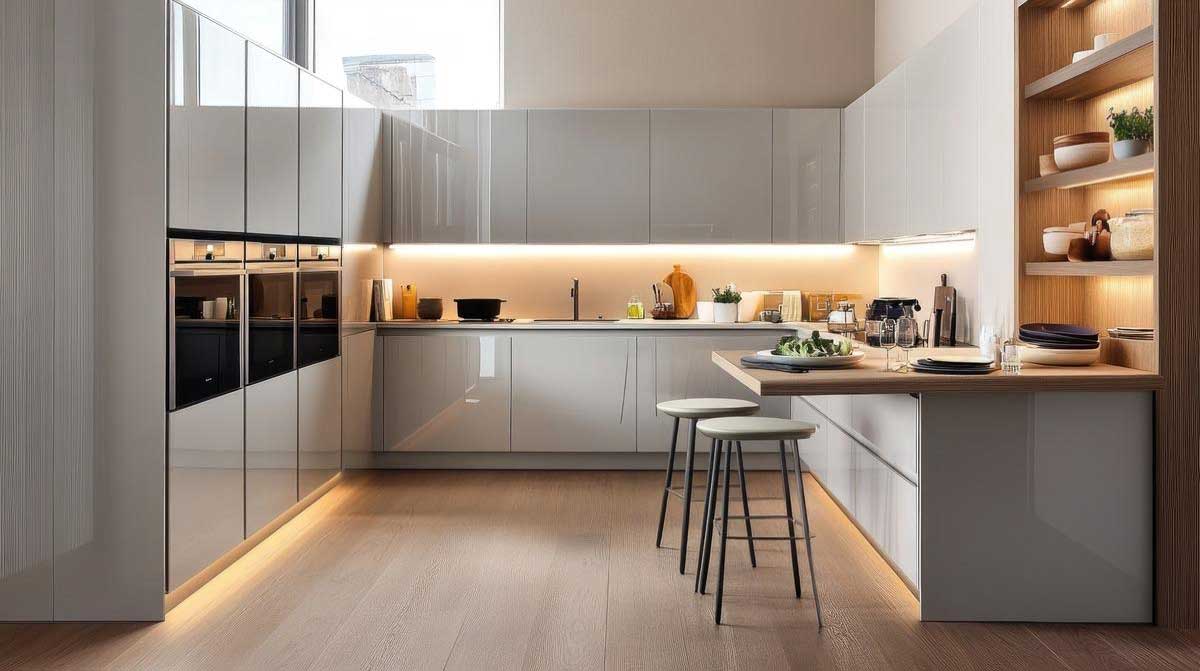
8. Putting It All Together: Creating a Cohesive Look
A well-designed kitchen needs colors, materials, and finishes that work together perfectly. Your vision should help create a space that shows your style and works well for daily use.
The right color palette becomes the foundation for all design choices. Here’s what you should consider:
|
Element |
Primary Color |
Accent Color |
Finish Type |
|
Cabinets |
Neutral Base |
Bold Accent |
Matte/Gloss |
|
Walls |
Light Tone |
Feature Wall |
Eggshell |
|
Flooring |
Neutral |
Pattern |
Natural |
|
Hardware |
Metallic |
Contrast |
Brushed |
Your countertops and backsplash should match your cabinet colors naturally. Natural materials like wood and stone add depth with their unique textures. People living in coastal areas should pick water-resistant materials that last longer.
Good lighting combines with smart material choices to bring the space together. Pendant lights above islands work as practical features and eye-catching focal points. A mix of under-cabinet fixtures and ambient lighting creates depth while keeping the kitchen functional.
Storage design should blend naturally with the overall look. Open shelves can display your matching dishes and décor that add character without making the space feel heavy. A clutter-free counter improves your kitchen’s overall look.
Small kitchen updates on a budget work well with white walls. These neutral backgrounds let you add color through moveable items like bar stools, rugs, and accessories. Fabric window treatments can soften the room and bring in new colors.
Your final touches, from artwork to small appliances, should match your design theme. Place decorative items carefully to create balance without overcrowding. Fresh flowers or plants improve the overall look while staying within budget.
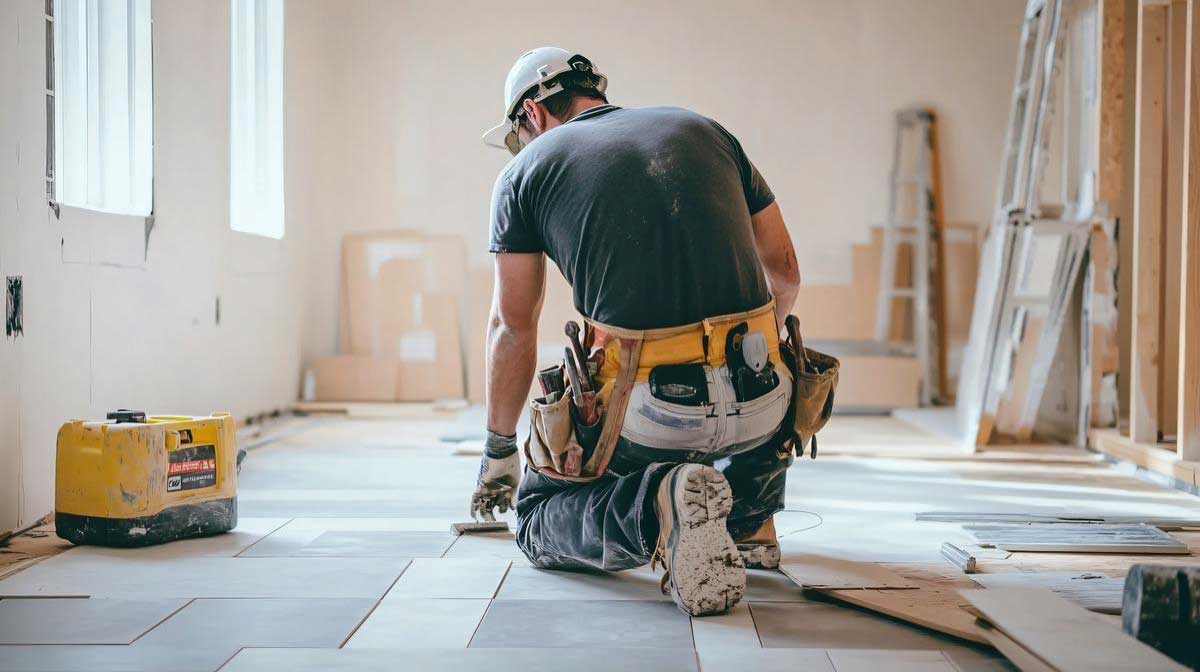
DIY vs. Hiring a Professional: Making the Right Choice
The choice between DIY and professional help for budget kitchen makeovers depends on several key factors. You need to assess the project scope, time availability, skill level, and safety concerns before making your decision.
The scope of work plays a big role in budget kitchen makeovers. You can handle simple cosmetic updates like painting cabinets or replacing hardware yourself. Complex renovations with structural changes or installations need professional expertise.
Your budget should cover more than the original costs. Professional contractors can get trade discounts on materials and appliances to offset their labor charges. DIY projects might save labor costs, but mistakes can get pricey quickly. Professional remodelers deliver quality workmanship with attention to detail.
Professional teams work faster and reduce kitchen downtime. DIY renovations take longer than planned, especially while learning new skills. You should match your available time, like evenings and weekends, with what the project needs.
Safety is a vital concern, especially when you have electrical, plumbing, or structural work. Professional contractors carry proper insurance and know local building codes. Building permits can make DIY projects more complex, and not following codes affects your home’s resale value.
Professional contractors bring expertise that delivers optimal results. Their experience helps them:
- Direct potential challenges naturally
- Create realistic timelines
- Manage subcontractors effectively
- Access high-quality materials at competitive prices
A mixed approach often works best. You can handle tasks you’re comfortable with and let professionals take care of complex work. This method balances savings with quality. Professional contractors suggest economical alternatives without cutting corners, helping you achieve your vision within budget.
|
Aspect |
DIY Approach |
Professional Service |
|
Cost |
Lower initial investment |
Higher upfront expense |
|
Timeline |
Extended completion time |
Efficient execution |
|
Quality |
Varies with skill level |
Consistent, high standard |
|
Risk |
Higher potential for errors |
Insured and guaranteed |
Professionals employ project management software to keep renovations on track and within budget. Their systematic approach coordinates different trades smoothly to deliver better results. Kitchen remodeling experts handle everything from equipment selection to final installation, giving complete project oversight.
Kitchen Upgrades Cost Comparison Guide
|
Upgrade Type |
Cost Range (CAD) |
Installation Time |
Durability/Lifespan |
ROI |
|
Cabinet Painting |
$3,500-$6,500 |
3-4 days |
8-10 years |
80% |
|
Cabinet Refacing |
$5,500-$9,500 |
3-5 days |
15-20 years |
70-80% |
|
Full Cabinet Remodel |
$25,000-$100,000+ |
4-6 weeks |
20-25 years |
60-70% |
|
Countertops (Laminate) |
$20-$90/sq ft |
NA |
Moderate |
NA |
|
Countertops (Solid Surface) |
$55-$210/sq ft |
NA |
High |
NA |
|
Backsplash |
$32-$243/linear ft |
1-2 days |
NA |
NA |
|
Under-cabinet Lighting |
$20-$70 |
1-2 days |
NA |
NA |
|
Vinyl Flooring |
$4.18/sq ft+ |
NA |
High |
NA |
Note: The costs shown are in Canadian Dollars (CAD). Some details remain unmarked where data wasn’t available in our source material.
Conclusion
Kitchen upgrades can reshape the scene without breaking the bank. Smart improvements like cabinet refinishing and modern lighting will give a lasting effect at reasonable costs. These changes boost both functionality and visual appeal. Your kitchen becomes a more enjoyable space for everyday use.
Homeowners can stretch their renovation budget through step-by-step improvements. Cabinet updates are the life-blood of any kitchen makeover. A fresh coat of paint or refacing cabinets creates substantial visual changes. New countertops and backsplashes add style and practicality. Lighting changes can dramatically change how your space feels, especially when you have layers of ambient, task, and accent lighting.
Simple changes often create amazing results. New hardware, paint colors, and better storage solutions boost kitchen functionality affordably. Modern energy-efficient appliances cut down operating costs and add convenience. These improvements deliver immediate benefits and add long-term value to your home.
Smart choices between DIY projects and professional help will ensure the best results. Motivated homeowners can handle simple cosmetic changes. Complex modifications need expert guidance. Looking to remodel your kitchen on a budget in Ottawa? Northco Services can help.
A soaring win depends on smart resource allocation rather than budget size. Homeowners can create remarkable kitchen transformations with strategic planning and careful upgrades. These affordable improvements create welcoming spaces that make daily life better and offer solid investment returns.
Frequently Asked Questions about Budget Friendly Kitchen Upgrades
Kitchen upgrades can reshape the scene without breaking the bank. Smart improvements like cabinet refinishing and modern lighting will give a lasting effect at reasonable costs. These changes boost both functionality and visual appeal. Your kitchen becomes a more enjoyable space for everyday use.
Can you do a kitchen for $5000?
A $5,000 budget for a full kitchen remodel is extremely tight. Realistically, at this price point, you’re primarily looking at cabinet painting as the main project. For a smaller kitchen, you might maybe be able to stretch the budget to include new hinges along with the paint job. A full gut and remodel is not realistic at this price point.
What is the most expensive part of a kitchen remodel?
Typically, cabinetry is the most expensive part of a kitchen remodel. Custom or high-end cabinets can significantly drive up the cost. Following that, major appliances, countertops (especially natural stone), and labor costs are also significant expenses.
What is a realistic budget for a kitchen in Canada?
In Canada, a realistic budget for a moderate kitchen renovation can range from $25,000 to $40,000. This allows for new cabinets, countertops, appliances, and some layout changes. For a high-end kitchen with custom features and premium materials, the budget can easily exceed $50,000 or more. Factors like the size of your kitchen, the quality of materials, and labor costs will all play a role.
What should I replace first in a kitchen remodel?
Start with the big-ticket items that have the biggest impact on functionality and layout: cabinets and countertops. If you’re changing the layout, address plumbing and electrical work first. Then consider appliances, followed by flooring, backsplash, and lighting. Cosmetic upgrades like hardware and paint should be the final touches.
What is a good budget for a kitchen renovation?
A ‘good’ budget depends on your goals and the scale of your project. For a basic refresh with cosmetic upgrades, $10,000 to $20,000 might suffice. For a more substantial renovation with new cabinets and countertops, $20,000 to $40,000 is a reasonable range. If you’re aiming for a luxurious, custom kitchen, be prepared to invest $50,000 or more.